Reading / Grades 3-5 / supported handwriting
Cursive: first letters and joins
Learning goal: Read and form i, t and u, join short words, and practice with tracing and blank writing guides.
Before you start: Recognize printed i, t and u and follow writing guides with a comfortable pencil grip. A helper may read directions or guide finger tracing. This is one simple practice style, not a complete alphabet course.
Read or print this lesson What to practiceThe video could not load. The transcript is still available below.
Next: your worksheet
Cursive: Form i, t and u
Checking sign-in...
Read the transcript
Saved reading place
Video transcript and practice. Reading or printing does not count as playback time or an assessed grade.
1. Read it, then write it
Video: 0:00
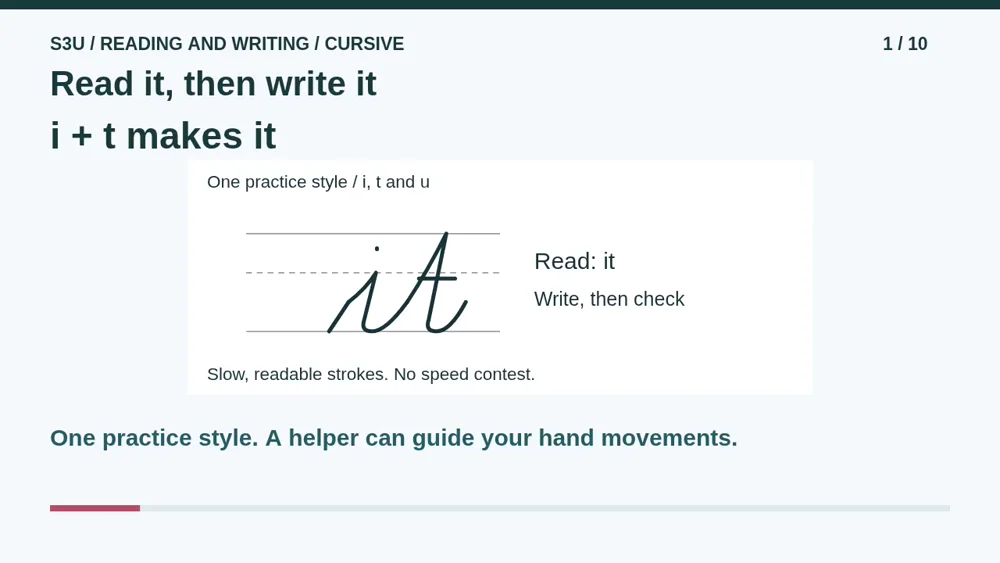
Today we will read and write three small cursive letters: i, t, and u. Then we will join letters into words. Cursive connects many letter strokes, but it does not glue every word in a sentence together! These original drawings show one simple practice style. Your teacher may use a different style. Use paper and a pencil, and ask a helper to watch your movements. We want comfortable, readable writing, not a speed contest.
2. Meet the three guides
Video: 0:33
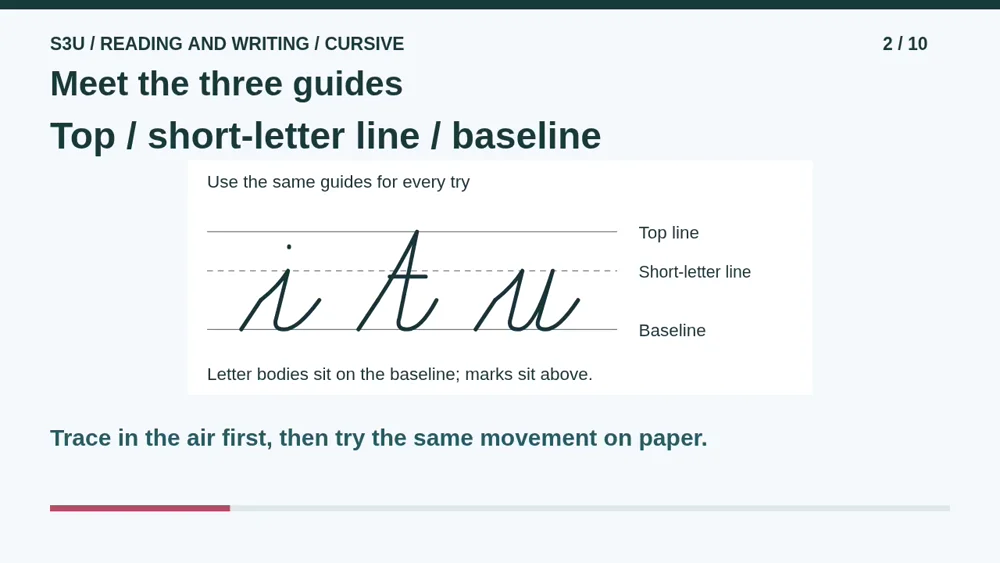
Find the bottom writing line. We call it the baseline. The dashed guide above it is the short-letter line. The highest guide is the top line. In our practice model, the bodies of i and u rise to the short-letter line. The t reaches the top line. Their bodies come back to the baseline. A dot or a crossbar is an extra mark. Try following a model with your finger before using a pencil.
3. Make a lowercase i
Video: 1:05
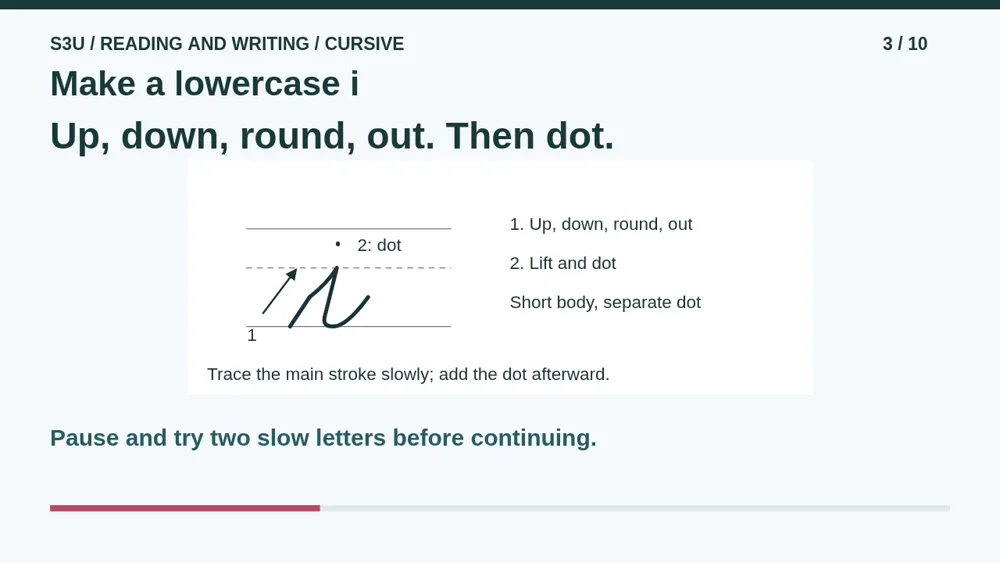
Start on the baseline at the left. Follow the rising stroke to the short-letter line. Come back down the slant, curve gently at the baseline, then lead up and right. That is the main stroke of our i. Now lift the pencil and add its dot above the short body. Do not turn the dot into a big balloon. A small clear dot is enough. Pause and try two letters. Ask your helper whether your body touches the baseline and your dot is easy to see.
4. Make a lowercase t
Video: 1:39
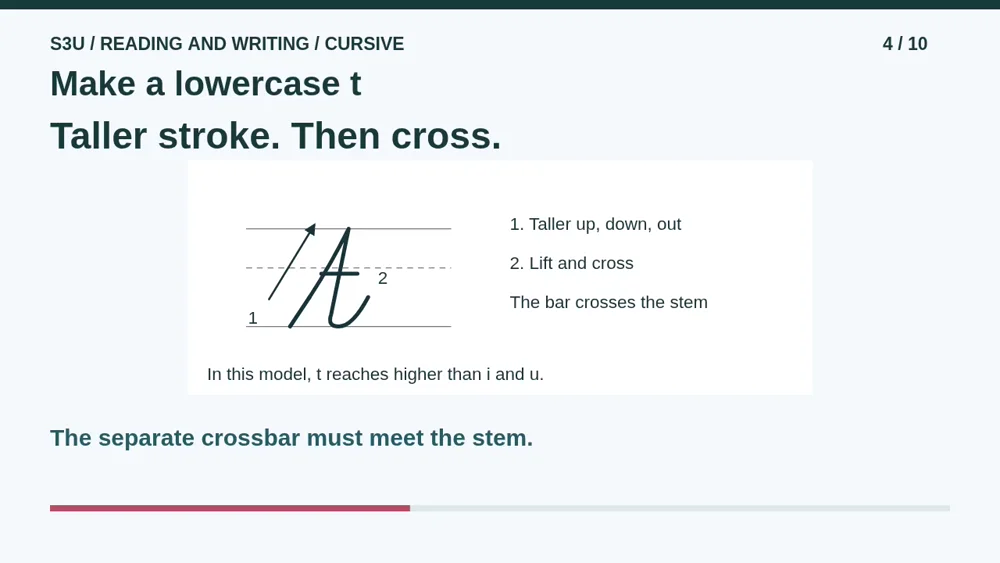
Start on the baseline again. This time the rising stroke reaches the top line. Come down the slant toward the baseline, curve, and lead up and right. Lift the pencil to add a short crossbar through the stem. That makes our t. Notice the difference: i is short and dotted; t is taller and crossed. Pause and write an i beside a t. Make their heights different. If the crossbar floats away from the stem, move it so it really crosses.
5. Make a lowercase u
Video: 2:13
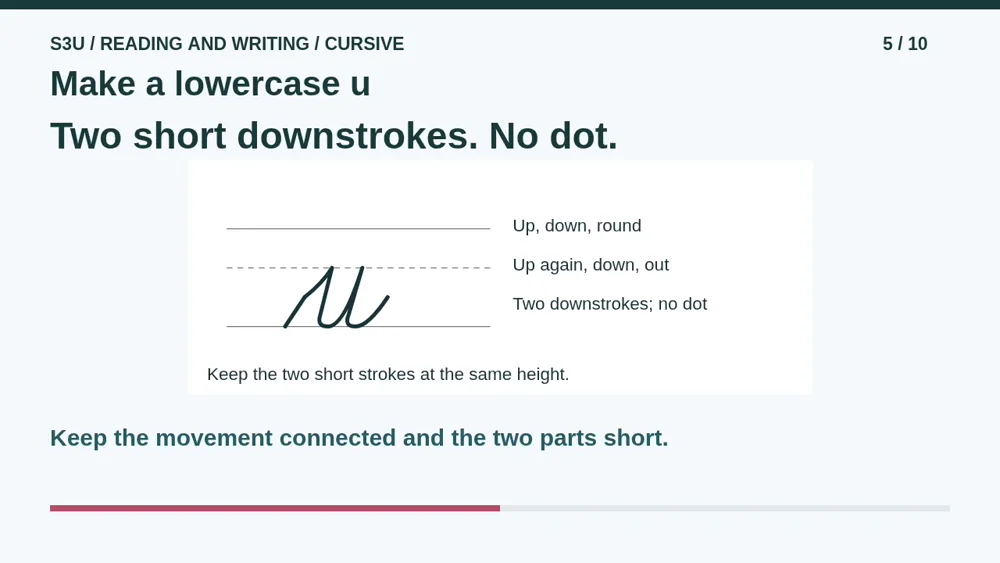
For u, rise to the short-letter line and come down the slant. Curve at the baseline, rise to the short-letter line again, come down again, and curve into an exit stroke. Keep this main movement connected. The two downstrokes stay short. There is no dot on u. A dot would be a visitor who came to the wrong letter! Pause and try two letters. Check the two short parts, the rounded bottoms, and the absence of a dot.
6. Join i to t
Video: 2:46
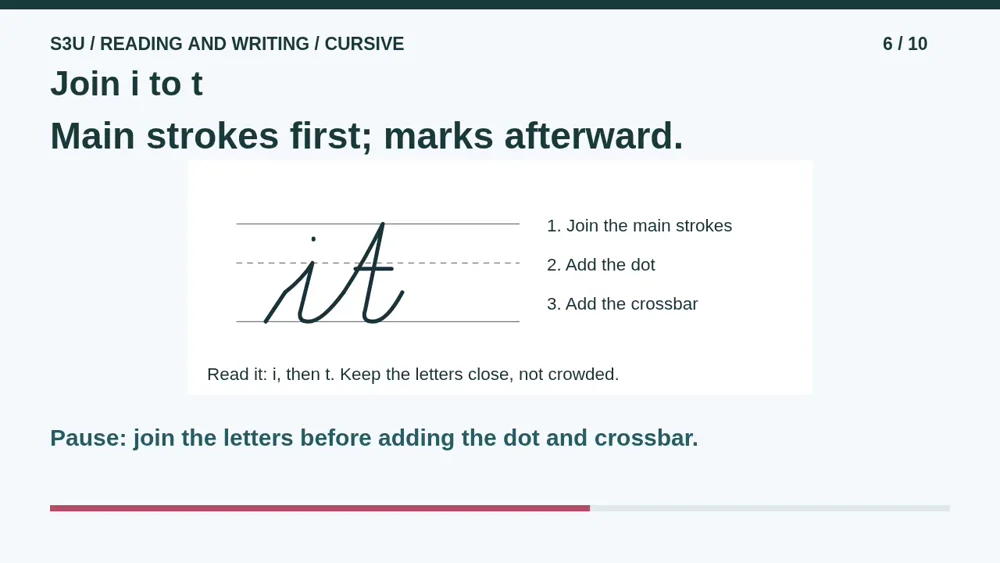
Now let the exit of i continue into the rising stroke of t. Keep your pencil down for the connected main strokes. When the word body is finished, lift to add the i dot and the t crossbar. Read the letters from left to right: i, t. The word is it. Pause and try it once. Then point to the place where the letters join. Leave enough room to recognize each shape; a join is a connection, not a knot.
7. Your turn: read and copy
Video: 3:18
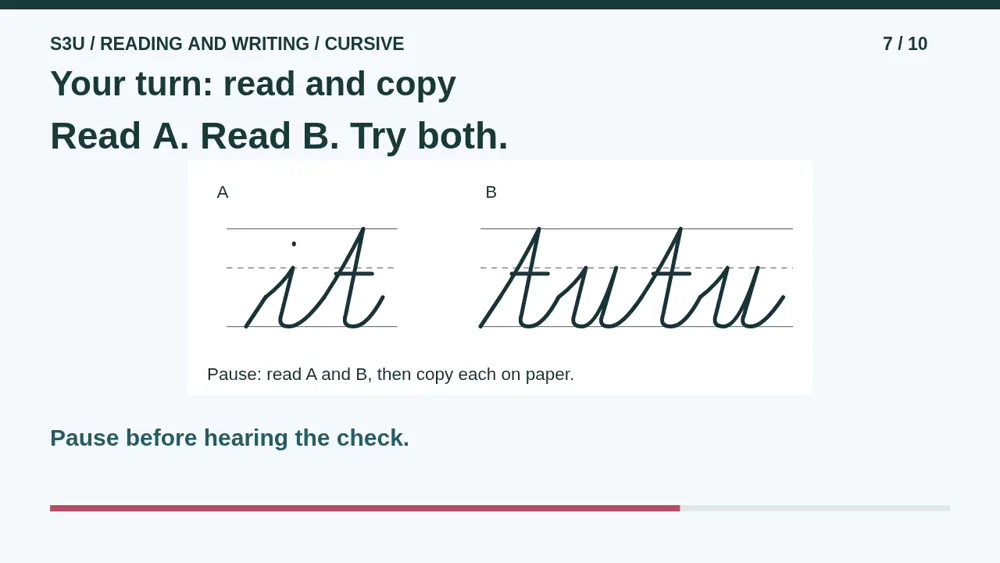
Here are two samples, A and B. Pause now. Read each letter from left to right, then say the whole word. Look for the dot, the crossbars, and the different heights. Copy both samples on paper. Check your pencil movements with a helper, not just the finished shapes. If a word is unfamiliar, read its letters first. Continue only after you have made your own attempt.
8. Check each letter
Video: 3:47
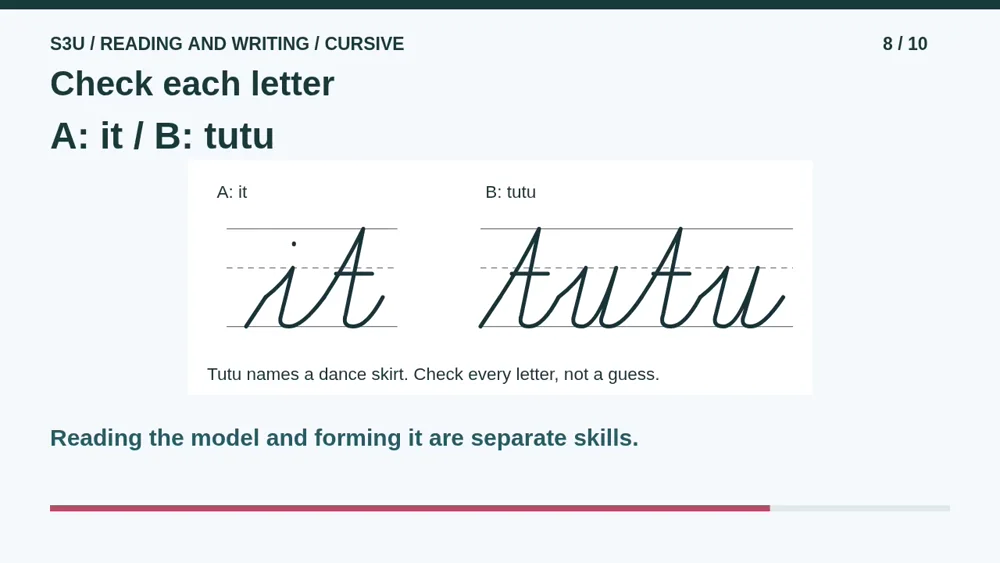
A reads it. B reads tutu: t, u, t, u. A tutu is a dance skirt. Both t letters are taller and crossed. Both u letters have two short downstrokes and no dot. Check your reading against those clues. Then look at your writing. Are the shapes clear? Did the letters connect? A correct spoken answer does not automatically mean the handwriting is formed well. Ask your helper to choose one useful improvement, and try the word again.
9. Words need a breathing space
Video: 4:24
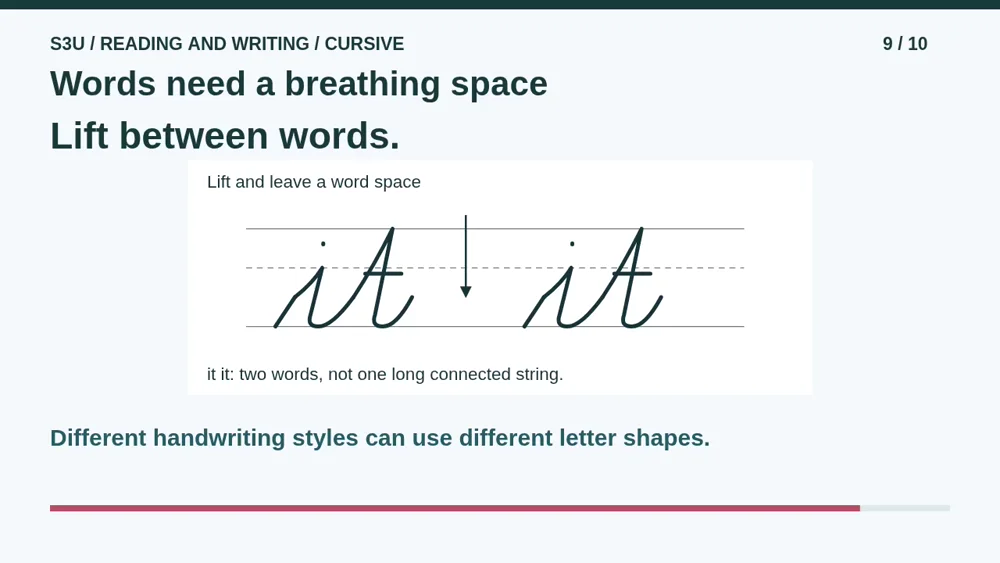
Write it, lift your pencil, leave a clear gap, and write it again. You have two words. Do not connect the exit of the first word across the space. Fun fact: the same letter can have different readable shapes in different handwriting styles. Our lesson models and the separate cursive worksheet maker use different models. That is not a spelling change. Follow the model your helper chooses consistently, and keep spaces, dots, and crossbars clear.
10. Continue with pencil practice
Video: 4:58
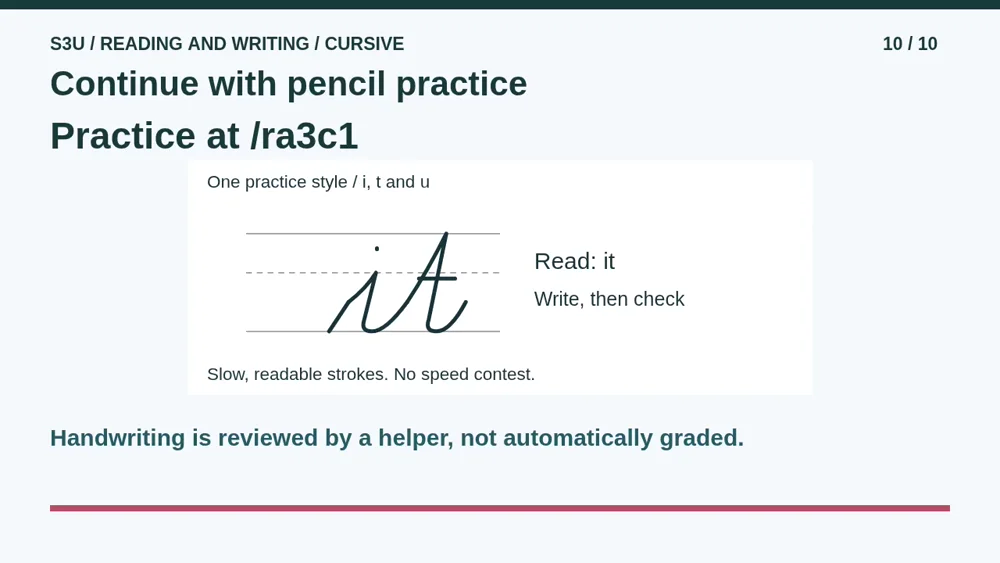
Continue to the first worksheet. Follow the model, trace the lighter strokes, then cover the model and use the blank guides. Work on a few clear letters before doing more. The second worksheet practices the connected words. Take a short break if your hand feels tired. The checked questions review what the strokes and marks mean; they do not grade handwriting, reading fluency, or speed. Finish by showing your helper one letter or join that became clearer.
Show your understanding
You can point, explain aloud, draw or write.
- Use height, dots and crossbars to read i, t and u in short connected words.
- Try the main strokes, add marks and leave word spaces on paper. A helper checks movement and legibility separately; online choices do not assess handwriting.
Try it yourself
Pause to read both samples, then copy them on paper before watching the check. Take your time and check one letter at a time.
Continue to the printable tracing and writing pages. A helper reviews the handwriting separately; checked questions do not grade formation, fluency or speed.
Next: your worksheet
Cursive: Form i, t and uhttps://s3u.com/ra3c1
Lesson: https://s3u.com/lessons/cursive-first-joins