Math / Grade 9
Name the sides of a right triangle
Learning goal: Choose the right angle and the reference angle, then distinguish the hypotenuse, opposite side and adjacent leg in turned drawings.
Before you start: Recognize acute and right angles, read a two-letter side name and locate endpoints. Use stated lengths; diagrams are schematic.
Read or print this lesson What to practiceThe video could not load. The transcript is still available below.
Next: your worksheet
Name Right-Triangle Sides
Checking sign-in...
Read the transcript
Saved reading place
Video transcript and practice. Reading or printing does not count as playback time or an assessed grade.
1. Find the right angle first
Video: 0:00
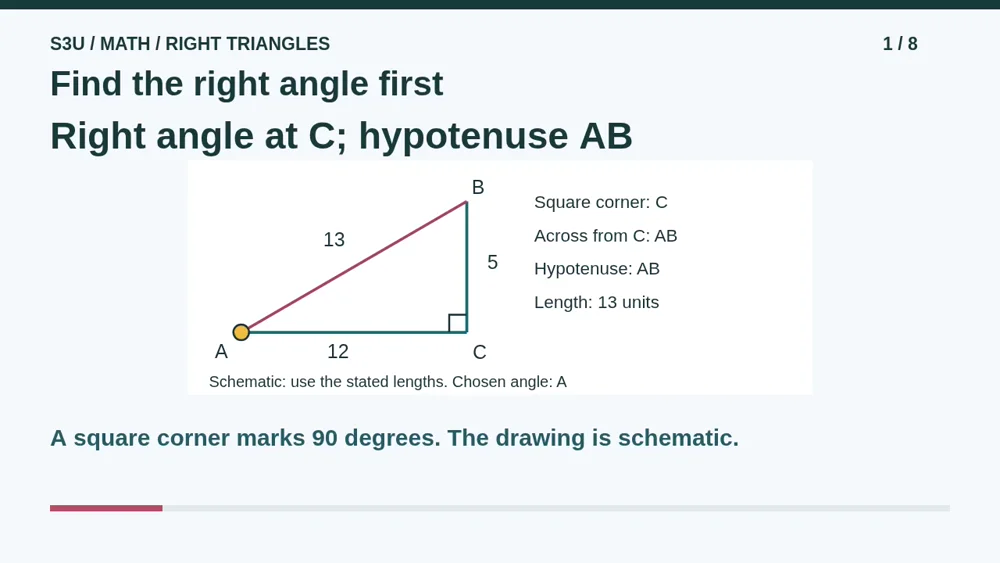
Before choosing a ratio, find the right angle. In triangle A B C, the small square marks the right angle at C. The side across from that corner is A B. It is the hypotenuse, the longest side of this right triangle. Its length is thirteen units. The two shorter sides, called legs, have lengths twelve and five. Use the labels, not a guess from the size of the drawing.
2. Choose the angle you mean
Video: 0:30
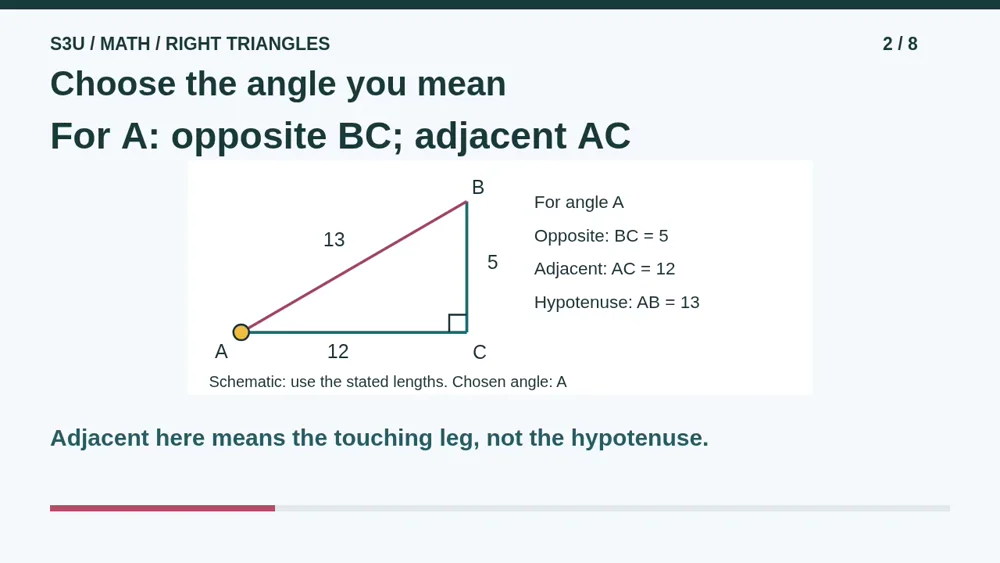
Now choose the acute angle at A. The side that does not touch A is B C, so B C is opposite A. The leg that touches A is A C, so A C is adjacent to A. The hypotenuse also touches A, but it is not the adjacent leg in these ratio definitions. First find the hypotenuse, then choose between the two legs. The word adjacent needs that extra care.
3. Another angle changes the roles
Video: 0:58
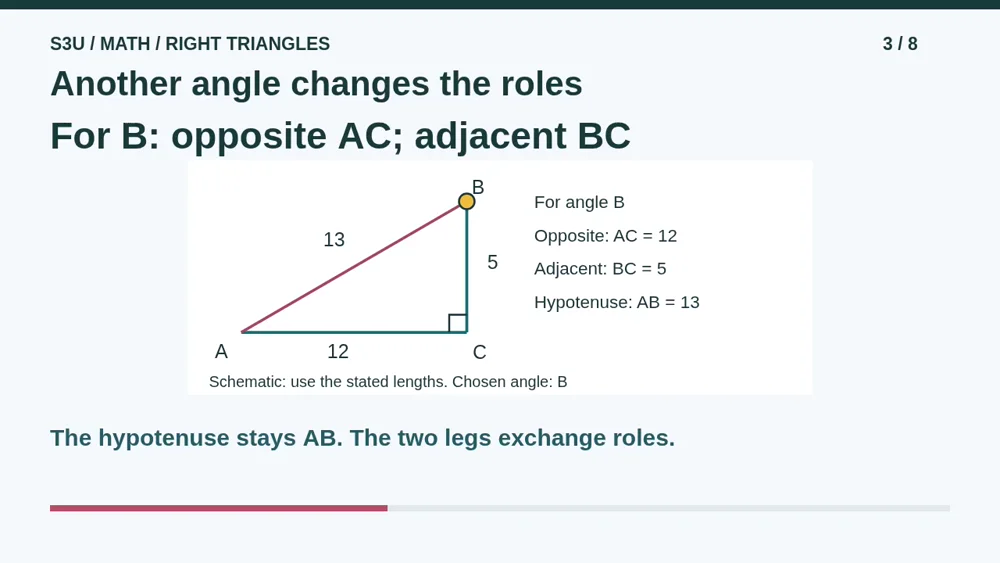
Keep the same triangle, but choose angle B instead. A C no longer touches the chosen angle, so it becomes opposite B. B C is now the adjacent leg. A B remains the hypotenuse because the right angle is still at C. The side lengths did not move or change. Only our chosen angle changed. A triangle is allowed to keep its shape while we ask a different question.
4. Turning the page changes nothing
Video: 1:28
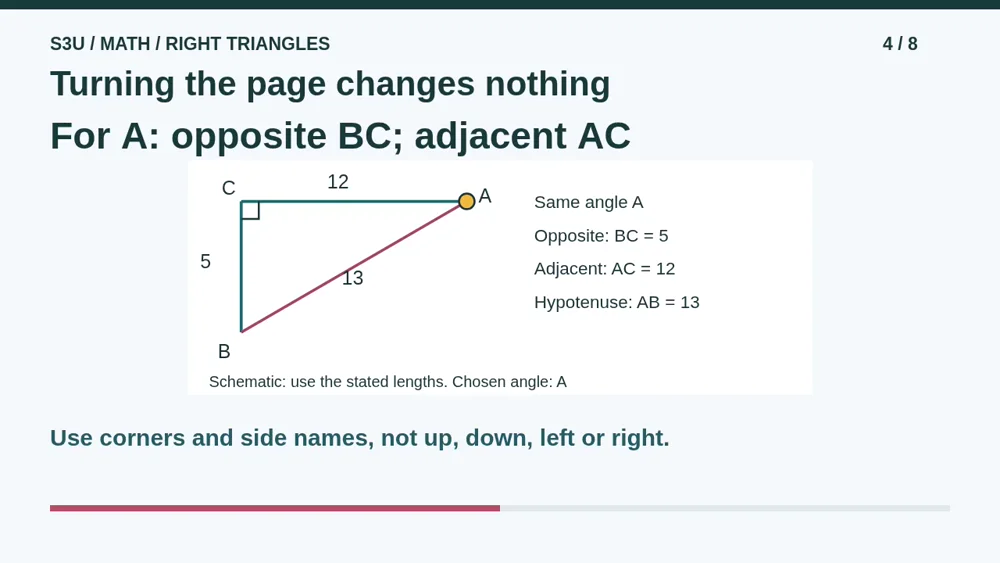
Imagine turning the paper. The side across from the square corner is still the hypotenuse. For angle A, B C is still opposite and A C is still the adjacent leg. Opposite does not mean the side at the top of a page. Adjacent does not mean whichever side looks horizontal. Follow the letter at the chosen angle, then the two ends of each side. The page has no special mathematical north.
5. Pause: name all three sides
Video: 1:59
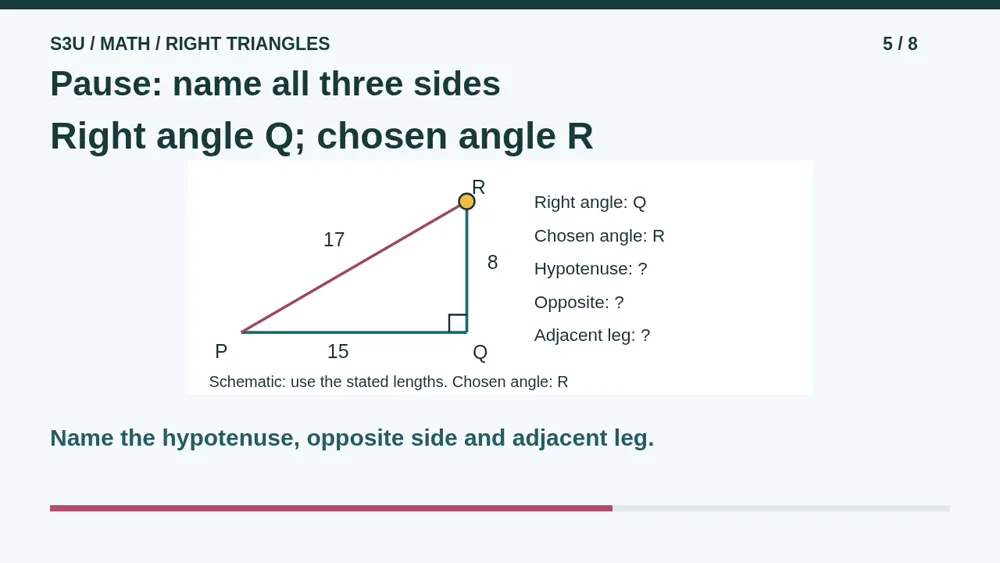
Pause for a different triangle. P Q R has a right angle at Q, and we choose the acute angle R. P Q is fifteen units, Q R is eight units, and P R is seventeen units. Name the hypotenuse, the side opposite R, and the leg adjacent to R. Say both the side letters and its length. You do not need to calculate the angle. Explain which corner or endpoint helped you decide.
6. Check the corners and endpoints
Video: 2:29
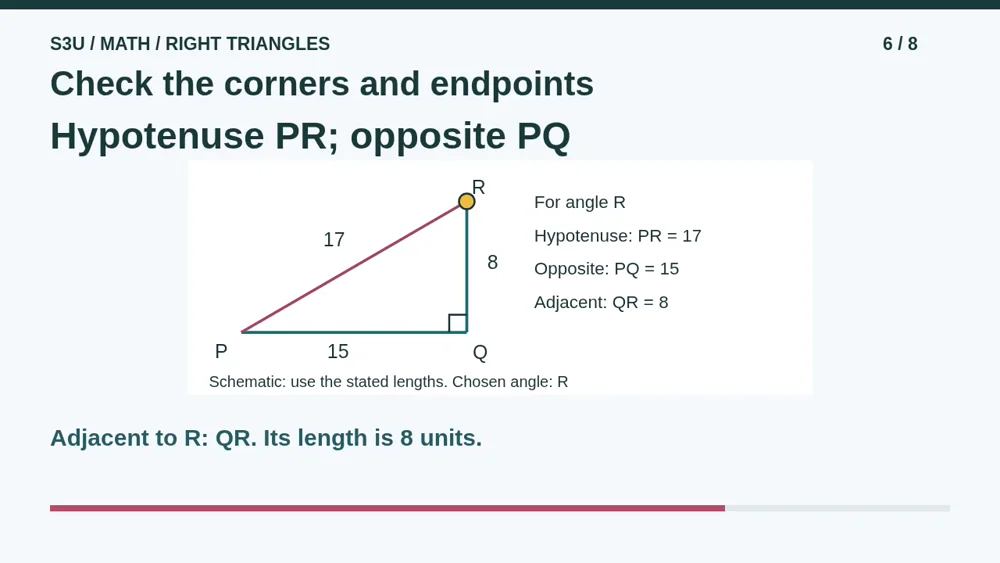
The hypotenuse is P R, seventeen units, because it lies across from the right angle Q. The opposite side for angle R is P Q, fifteen units, because it does not touch R. The adjacent leg is Q R, eight units. P R also touches R, but we already identified it as the hypotenuse. If you chose P as the angle instead, the legs would exchange roles. The hypotenuse would not change.
7. Bigger triangle, same angle
Video: 3:00
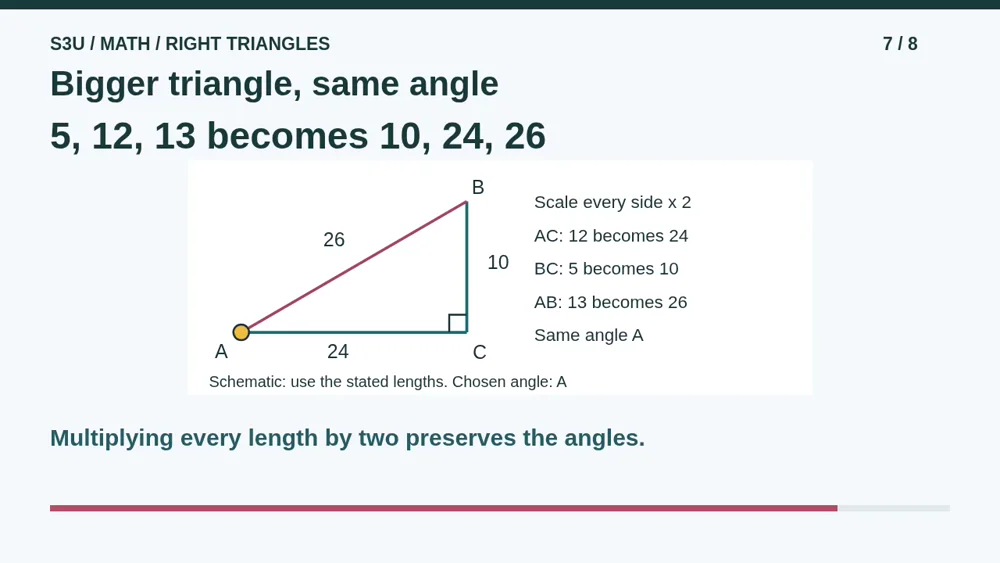
Fun fact: enlarging every side by the same positive scale factor keeps a triangle similar to the original. Doubling our five, twelve and thirteen lengths gives ten, twenty four and twenty six. The corresponding angles stay the same, and the corresponding side roles stay the same. Doubling just one side would not be this enlargement. That idea will explain why right triangle ratios depend on an angle rather than on how large we draw the triangle.
8. Continue to side-name practice
Video: 3:34
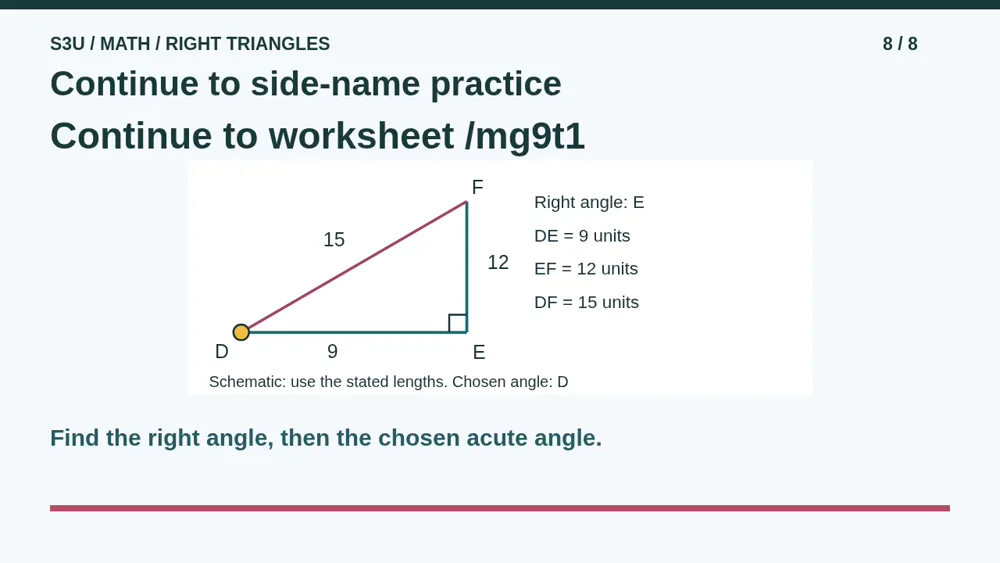
Continue to the worksheet below, then try the second side naming sheet. Each gives its own letters and lengths, including a turned drawing. Find the square corner first and name the hypotenuse. Next, find the chosen acute angle and identify its opposite side and adjacent leg. After that practice, the next lesson compares sine, cosine and tangent using these same three side roles. Watching and worksheet practice are recorded separately.
Show your understanding
You can point, explain aloud, draw or write.
- Identify the hypotenuse from the right angle and the opposite and adjacent legs from a named acute angle.
- Explain how changing the reference angle exchanges the leg roles, while rotation or similar enlargement preserves corresponding roles.
Try it yourself
Pause at triangle PQR. Name each side role for angle R and explain the corner or endpoints that justify it.
Continue to both side-name worksheets, then the triangle-ratio lesson. Turning a drawing does not change its mathematical relationships.
Next: your worksheet
Name Right-Triangle Sideshttps://s3u.com/mg9t1
Lesson: https://s3u.com/lessons/right-triangle-sides