Creativity / Grade 7
Draw depth with one point
Learning goal: Set a level-view horizon, guide a front-facing box into depth, and explain which edges converge and which stay horizontal or vertical.
Before you start: Recognize horizontal, vertical and parallel directions. You may draw or describe a construction.
Read or print this lesson What to practiceThe video could not load. The transcript is still available below.
Next: your worksheet
Use One-Point Perspective as a Drawing Model
Checking sign-in...
Read the transcript
Saved reading place
Video transcript and practice. Reading or printing does not count as playback time or an assessed grade.
1. Give a flat box some depth
Video: 0:00
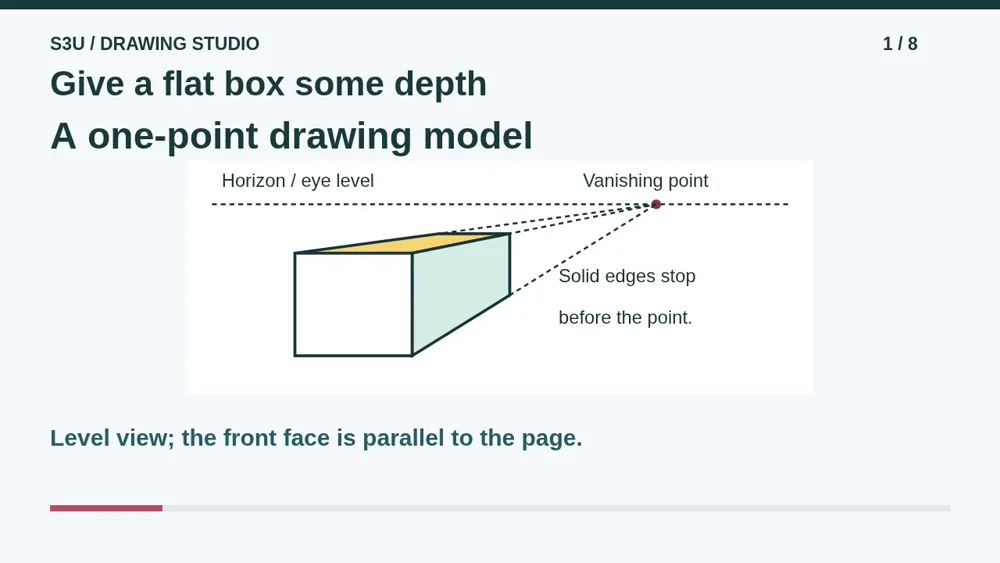
Let us draw an invented box with a flat front and some depth behind it. We will use one-point perspective. Keep the view level and the front face parallel to the picture plane, like a rectangle facing the page. This is one drawing method, not a rule that every artwork must follow.
2. Set the eye level
Video: 0:22
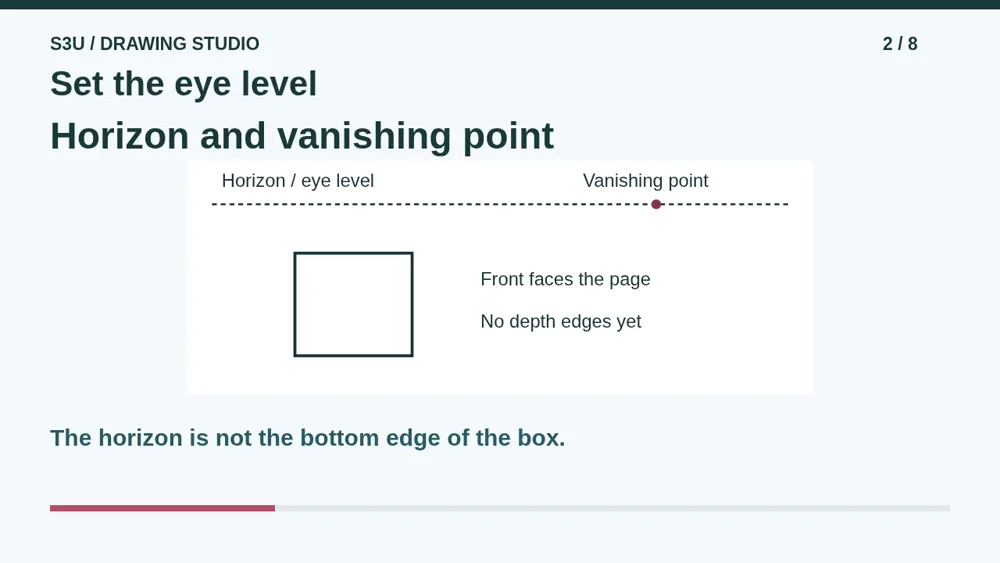
Draw a horizontal guide for eye level in this level-view model. We call it the horizon line, even in an indoor drawing where no sky is visible. Mark a vanishing point on it, then draw the rectangular front below it. Our point is to the right of the box, not necessarily at the center of the page.
3. Guide the depth edges
Video: 0:45
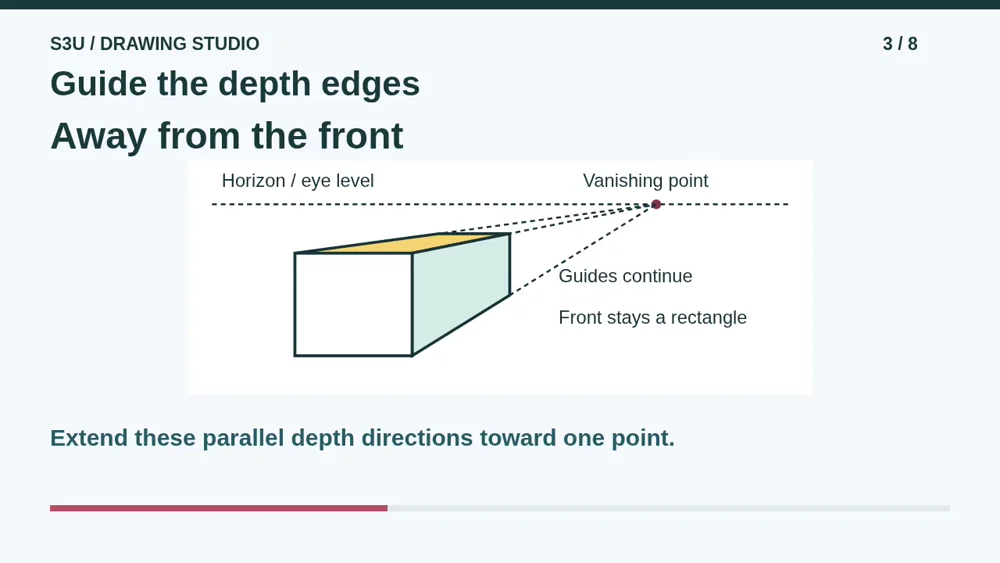
From the front corners, draw light guides toward the vanishing point. They represent edges running straight away from the front, perpendicular to it. Those real parallel directions converge in this drawing. The front face keeps its horizontal and vertical edges. Do not aim every line in your picture at the dot.
4. Stop before the point
Video: 1:08
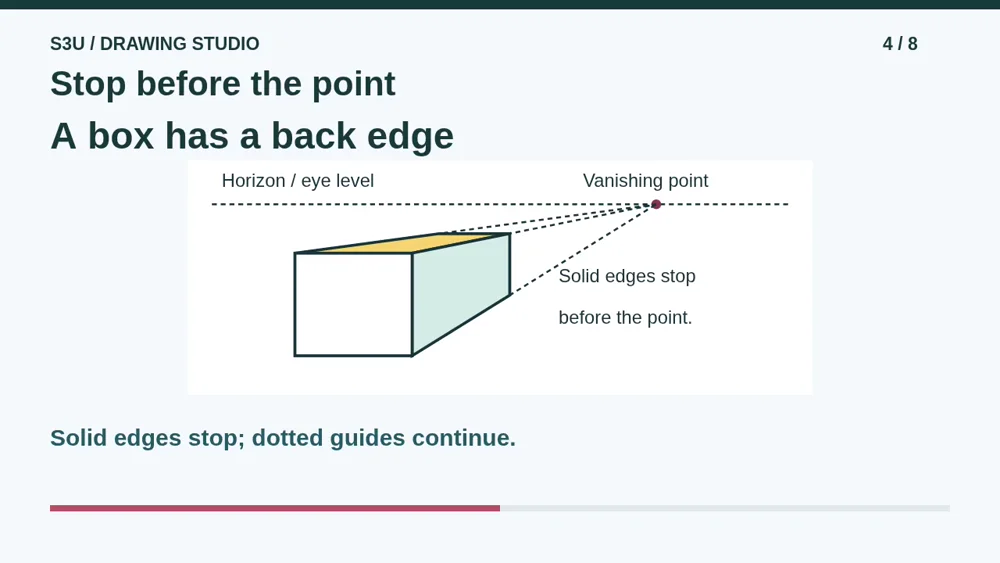
Choose a place along the guides for the back of the box. Join corresponding back corners with horizontal and vertical edges. Our solid box edges stop there; only the dotted construction guides continue to the vanishing point. A box does not have to stretch all the way to the horizon. It has other appointments.
5. Pause: the point moves left
Video: 1:32
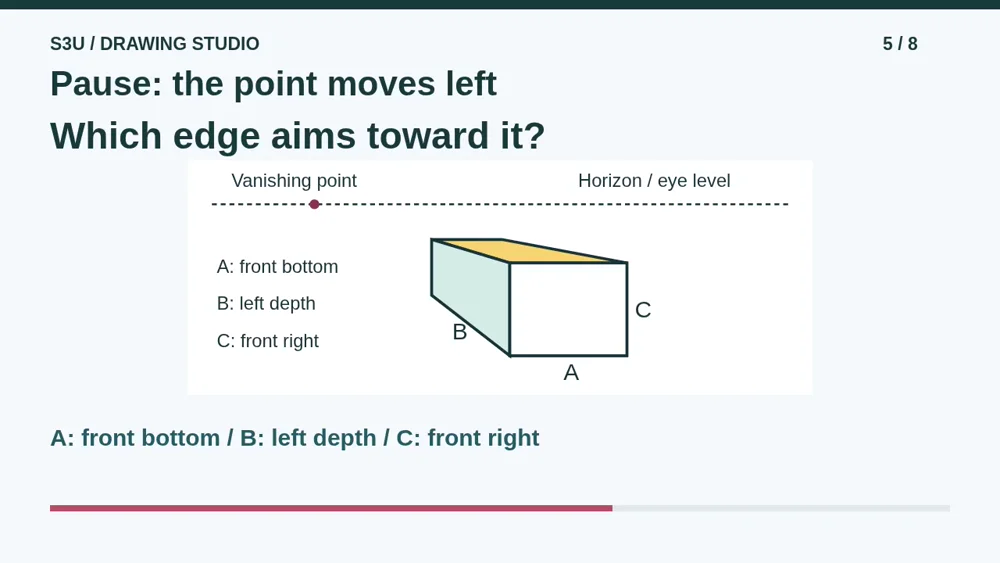
Pause at a new box. Its vanishing point is on the left, and its front still faces the page. A is the front bottom edge. B runs backward from the lower left corner. C is the front right edge. Which edge should extend toward the point? What directions should the other two keep?
6. Check the edge directions
Video: 1:55
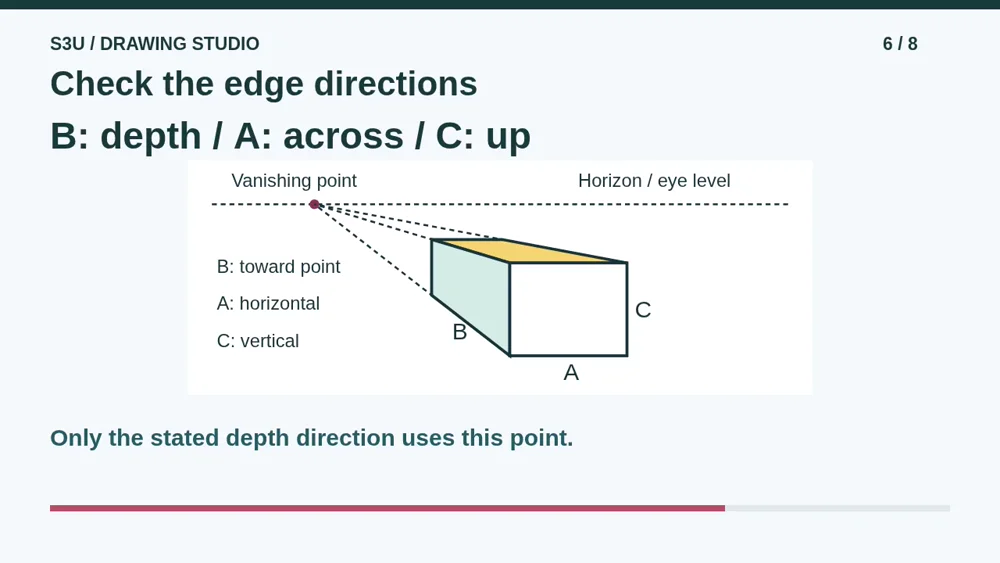
B is the depth edge. Its dotted extension reaches the vanishing point. A stays horizontal across the front, and C stays vertical up the front. The point moved left, but those front directions did not change. These rules depend on our level, front-facing setup. A turned or tilted box needs a different construction.
7. The point is a drawing clue
Video: 2:21
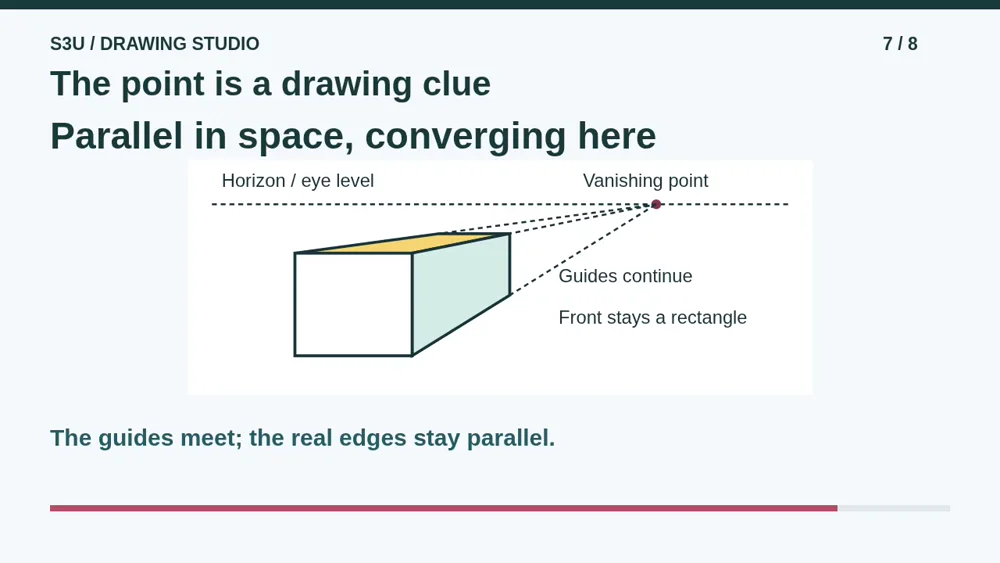
Fun fact: the vanishing point can sit outside the drawn object, as it does here. It helps organize the directions even though it is not a corner of the box. The convergence belongs to the picture. It does not mean real parallel box edges bend together or physically meet in the distance.
8. Plan a place with depth
Video: 2:43
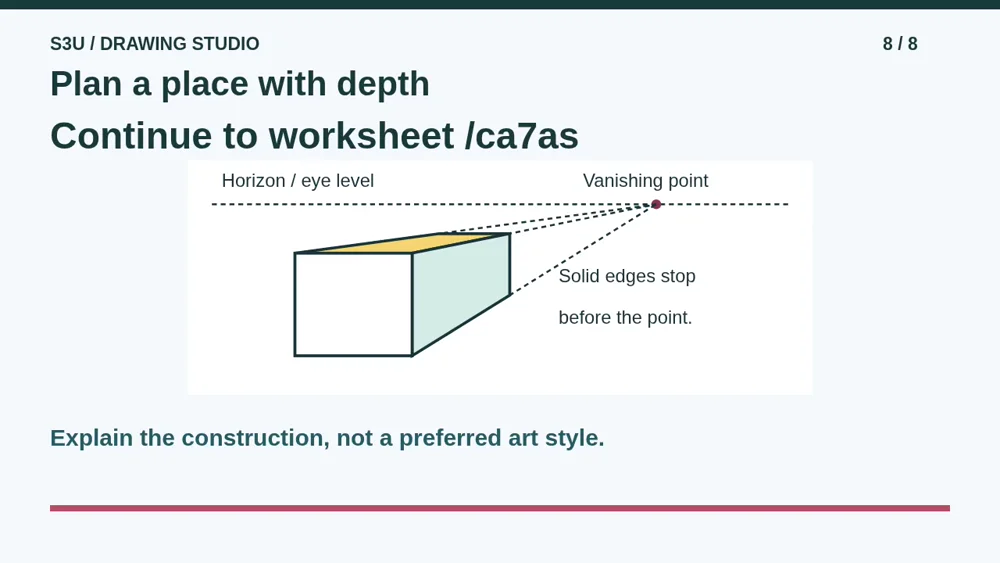
Continue to the worksheet below. Its corridor uses the same straight-on, level-view idea with different edges. Then plan an invented space with a horizon, a vanishing point, two depth guides and a front vertical. You may describe your plan instead of drawing. Artistic style is unscored, and no upload is required.
Show your understanding
You can point, explain aloud, draw or write.
- Use a horizon and vanishing point to guide depth edges in a level, front-facing one-point model.
- Distinguish receding edges from front horizontal and vertical edges, and explain why solid edges can stop before the point.
Try it yourself
Pause at the box with its point on the left. Identify the depth edge and explain the directions of the two front edges.
Continue to the corridor worksheet, then draw or describe an invented space. Keep the model limits clear; no preferred style or upload is required.
Next: your worksheet
Use One-Point Perspective as a Drawing Modelhttps://s3u.com/ca7as
Lesson: https://s3u.com/lessons/one-point-depth